To build a Magento 2 website, choose the product and deployment model, plan the store hierarchy, match hosting to a supported release, install with Composer in development, configure the theme and catalog, set up payments and delivery, then rehearse a complete order before launch.
For an established retailer, “complete” includes the operations you cannot lose: loyalty, pickup, returns, campaign landing pages and the systems receiving orders. This guide preserves the practical build path while showing which decisions the ecommerce lead, IT and operations must make before the first theme is built.
It covers Magento Open Source and applicable self-hosted Adobe Commerce implementations—not every Adobe commerce product or deployment model. Use the primary documentation for your selected release.
1. Decide whether Magento fits the job
Evaluate Magento when the store needs a configurable catalog, custom buying workflows, multiple storefront contexts or connected business systems. Those capabilities also need engineering and operating ownership. A simple store may need only a supported theme and standard modules—or another platform with a smaller maintenance burden.
Write down the launch tasks: find a product, select a variant, see the right price, pay, receive confirmation and fulfill the order. Add existing pickup, returns and loyalty obligations. If you already run a store, distinguish a platform limitation from missing data or a broken process. Fix, refactor or replatform is a useful decision before committing to a new build.
Do not use “Magento,” “Adobe Commerce” and “cloud” as interchangeable purchase specifications. Confirm the product, license and deployment model. The official installation guide distinguishes magento/project-community-edition and magento/project-enterprise-edition; that does not make their features, support or B2B entitlements identical.
The ecommerce lead defines the buying and publishing tasks, operations accepts fulfillment, and IT owns compatibility and integration risks. The budget approver should compare license, infrastructure, support, manual work, migration, training and transition costs on the same time horizon. Open Source does not mean a cost-free store.
2. Plan the store hierarchy and data before design
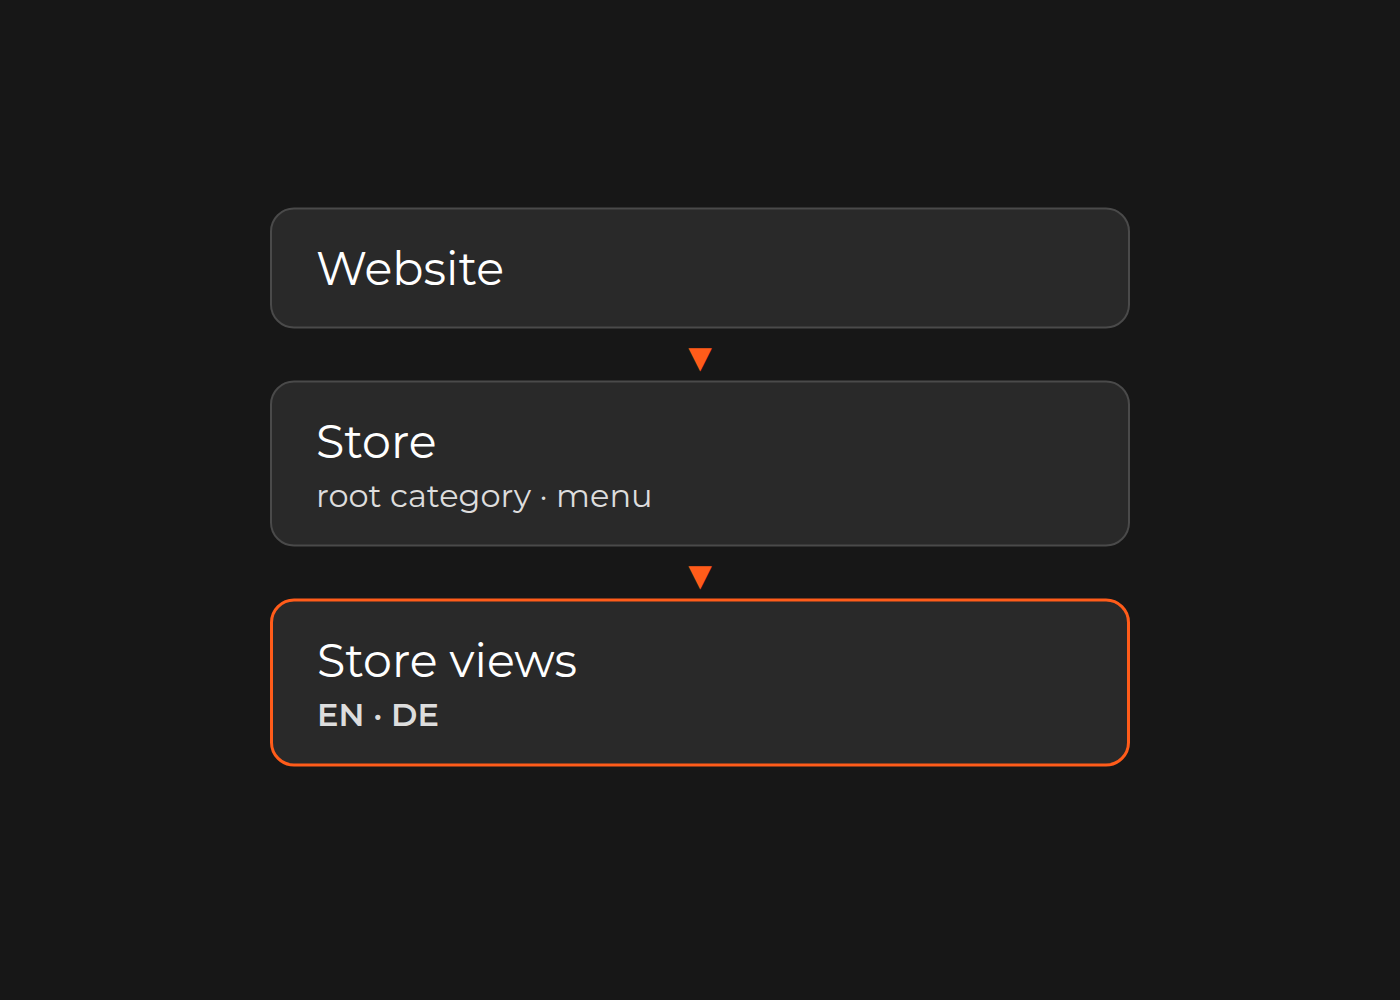
Magento’s hierarchy is website → store → store view. Adobe’s store-structure guide explains that a store can have its own root category and menu; store views commonly support languages.
Document which catalog, content, configuration, domains, languages, payment rules and customer contexts must be shared or separated. Do not create another website solely because a page needs translation. A locale setting does not translate product content.
Also define stable product and variant SKUs, attribute sets, units and required facts; the source and correction owner for price and stock; customer/account identifiers and permissions; order destinations and returned statuses; and existing URLs and campaign paths to preserve.
3. Match hosting to the release
Choose the application release and patch deliberately. Check lifecycle and extension compatibility, then use the current system-requirements matrix to match PHP, Composer, database, search and other services to the same release and deployment column. Do not copy an old tutorial’s dependencies or treat a prerelease matrix row as a production recommendation.
Evaluate hosting against catalog and index size, concurrent buying tasks, imports, background jobs, integrations, caching, backups and recovery—not a daily-visitor slogan.
Separate development, staging and production. Assign patching, TLS, access, backup/restore, logs, monitoring and deployment responsibilities. Restrict staging access and indexing, and use sanitized or specifically authorized test data.
4. Install with Composer in development
Follow Adobe’s Composer installation guide after completing its prerequisites. This path uses Composer and command-line installation, not the old browser setup wizard.
Prepare compatible services, web configuration, database and PHP extensions.
Set the filesystem owner and permissions according to the official guide; do not make the application world-writable to bypass an error.
Obtain authorized repository access through the project’s secret-handling process.
Create the Composer project for the selected edition and reviewed version in a new directory.
Configure installation options for the database, search, base URL, locale, currency, timezone and administrator.
Complete deployment-specific background processing, cache, indexing and email setup; verify storefront and Admin access.
These command templates are orientation aids, not ready-to-run installers:
Review bin/magento --version and bin/magento help setup:install from the new application root. The installation template assumes a prepared compatible OpenSearch service; its search-engine setting resolves to opensearch. Review authentication/TLS options for the chosen release. All environment parameters require reviewed values. Supply secrets through the project’s approved process, not tickets, screenshots or shared command histories. Use a new development database, never an existing live one.
5. Design the buying experience and choose a theme
Wireframe the homepage, category/search, product page, cart, checkout and account tasks. Choose a maintained theme compatible with the selected release and extensions. Test mobile behavior, accessibility, browsers, localization and performance using representative content, not only the demo catalog.
Prefer supported configuration where it satisfies the task. Use maintainable customization rather than editing platform core files. For a design engagement, see Magento website design services.
Configure store identity, contact information, navigation, CMS pages and supported content components. Ask a non-developer editor to assemble and preview an agreed landing page and follow its approval/release process. Blog and comment features depend on the actual implementation; do not assume another CMS’s features transfer.
6. Add and verify your first product
Before bulk import, create one representative product in staging. Adobe’s simple-product guide uses Catalog → Products → Add Product → Simple Product.
Choose the product family’s attribute set.
Enter name, stable SKU, price and required attributes. Keep Enable Product = No while incomplete.
Configure tax class with the responsible business owner, quantity/source settings, weight, visibility and categories.
Add verified descriptions, authorized images, SEO fields, website assignment and product relationships.
Check store-view scope before editing localized fields.
Enable the completed test product in the controlled staging catalog and inspect Customer View.
Use the right product type: variants, bundles and downloadable items have different requirements. Missing facts remain preparation work, not generated truth. If an item is invisible, check enablement, website assignment, category, visibility, salability, indexing and cache rather than repeatedly importing it.
7. Configure payments, delivery and connected operations
Use the payment provider’s supported integration and test environment. Check authorization, capture, decline, cancellation, refund and duplicate notifications as applicable. Do not use live card data for routine development tests.
Configure shipping destinations, units and rates for the real fulfillment model. Have responsible owners review tax and policy decisions. Test transactional emails, contact forms, account recovery and support routing too.
For pickup, follow Adobe’s in-store delivery guide. Prepare a non-default stock/source configured as a pickup location, distance-priority settings, required geocodes and default tax destination settings. In Stores → Configuration → Sales → Delivery Methods → In-Store Delivery, enable the method and configure title, method name, price, search radius and unavailable-method message. Save and test eligible and unavailable locations in each intended view.
For ERP, warehouse, CRM and loyalty interfaces, define field authority, direction, freshness and failure handling. A checkout confirmation does not prove that operations received one correct order. Verify receipt and the status returned to the customer.
8. Create multilingual views deliberately
For a shared catalog with multiple language views, start from the agreed store hierarchy:
In Stores → All Stores, create the view under its intended store.
Assign a unique code and enable it in the controlled environment.
Select the view in configuration and set its supported locale settings.
Configure URLs and language switching; coordinate server routing with the developer.
Translate and review product fields, CMS content, navigation, emails, interface strings and metadata.
Test switcher, URLs, search, forms, checkout and transactional messages in each view.
A language package does not translate the catalog automatically. Separate websites or domains can require additional application and server configuration.
9. Rehearse a complete order before launch
In this fictional example, a retailer launches English and German views with pickup. Use a known test SKU and authorized test stock; collect evidence at each boundary.
Step
Proof to collect
Stop condition
Discover
Correct category, variant and language
Wrong item or critical untranslated field
Buy
Correct total, payment and pickup choice
Missing method or inconsistent total
Receive
One correct operational order
Missing or duplicate receipt
Fulfill
Staff identify location and order state
Site and store disagree
Reverse
Cancellation/refund, stock and loyalty reconcile
Unexplained money or balance change
Measure
Expected event once, with order reference
Missing or duplicate conversion
For an existing store, rehearse migration and cutover separately. Map keys and fields; reconcile products, customers, media and relationships; keep an exception list with data owners. Test critical flows under an agreed realistic load. Validate redirects, canonical URLs, campaign parameters, forms and analytics. Define go/no-go ownership, fallback and reconciliation of orders created during transition. Rollback cannot simply erase new transactions.
What real Magento work adds to the checklist
The Goddess case describes Dinarys’ Magento 1-to-2 migration and delta migration, customized Luma theme, OnePage Checkout fields, courier-timeframe logic and localization. Its requirements include module testing and full regression. This is evidence for specific migration and checkout work, not proof that a tutorial install delivers a working business.
The Prostor case describes Magento 2 migration with pickup, unified loyalty and ERP/CRM integrations. It also reports early inventory inconsistencies requiring reconciliation, synchronization-frequency changes and a validation layer. That operational detail is why an order trace belongs in a launch plan. The case does not establish your own returns workflow or guarantee an uninterrupted cutover.
10. Use the Magento launch checklist
Use this checklist to identify the next unresolved decision. Record an evidence reference and accepting owner for each item.
[ ] Payments, delivery, taxes, messages and account recovery reviewed.
[ ] Positive, negative, retry and reversal order tests completed.
[ ] Migration records and URL mappings reconciled where relevant.
[ ] Critical flow tested under the agreed workload.
[ ] Access, restore, monitoring, patching and deployment owners assigned.
[ ] Release criteria, stop conditions, transition reconciliation and support handover recorded.
Estimate design, data preparation, interfaces, extensions, testing, migration, training and recurring operation separately. First check supported configuration and maintained extensions; a custom extension needs defined interfaces, permissions, tests, upgrade compatibility and an owner. A theme refresh, platform upgrade and replatforming are different scopes.
Bring the unresolved launch decisions
If your team can own the checklist, use it internally. For a connected build, review Magento development services or Magento 2 development, then contact Dinarys with the launch tasks, proposed store hierarchy, current platform/release, sanitized product and order examples, required integrations and ERP/operations acceptance owners. Include pickup, loyalty, returns and existing URLs that must survive the change. Do not send credentials or unrestricted customer data.
You may share this article
Let professionals meet your challenge
Our certified specialists will find the most optimal solution for your business.