Content
Magento

Magento 2 Performance Testing: Step-by-step Guide


Is your online store powered by the renowned eCommerce platform Magento 2? Despite its well tried-and-tested practical benefits, there are still certain performance issues you should be aware of. To help you be prepared for most of these potential drawbacks, we composed this detailed guide on Magento performance testing.
Also read:
Magento Ecommerce Development Guide
Why Choose Magento for Building an eCommerce Store in 2020?
Move Your E-commerce Store to Magento
How to Hire the Best Magento Developers in 2020
How to Indicate Performance Issues in Magento 2?
It is obvious that you’re better off using dedicated software tools for these purposes. In particular, solutions such as:
- Magento Speed Test;
- WebPageTest;
- GTmetrix and others.
With these insightful tools at your side, you can easily clarify indicators of the page loading speed in a web resource and get detailed reports on the primary reasons for slowdowns. Some of them also display the browser used, location, speed levels, detailed page stress-load statistics, number of requests, and total page “weight”.
Lets talk about itHave a project in mind?
On top of that, using these solutions, you can easily automate speed checking procedures and enable them to start independently, according to a predefined schedule.
However, these tools will simply help you indicate particular performance issues on your site. You can use of the numerous site speed test tools. For a more detailed analysis and testing itself, you will need more powerful solutions. Let’s take a look.
Picking Magento Performance Testing Tools
Formally, the performance testing of Magento 2-based solutions rests on two types of procedures: load and stress tests. Let’s discuss some of the top tools you will need to implement both.
Apache JMeter
Thus, Apache JMeter is most frequently used for both load and stress testing. With its help, the tester can record actions in a web browser or manually create a script that can then emulate the traffic of hundreds or thousands of users. This helps to reproduce very voluminous loads on the site without involving thousands of real users in the testing process.
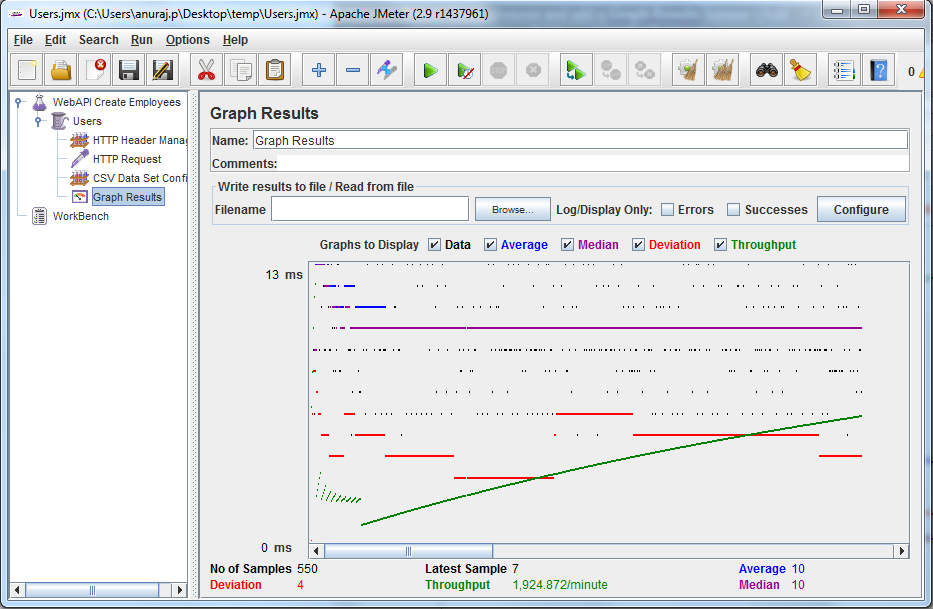
Image Source: dotnetthoughts.net
Note that for over 20 years, Jmeter has been preferred by many for platform independence, convenient and accessible GUI, multithreading support, extensibility, and in-depth reporting features. Due to the modular software architecture, JMeter can be customized and expanded as the user sees fit, implementing even very non-trivial test scripts.
You can also use the API to write your own custom scripts. By the way, if necessary, you can reproduce distributed testing with JMeter as well. The standing-out handy feature of JMeter the proxy mode, which significantly simplifies the creation of HTTP tests.
Siege
Siege has similar characteristics - it is a much simpler and more lightweight tool for stress testing web servers. It was created in order to give developers the opportunity to check the resource consumption of their code in conditions as close as possible to the real functional environment. Siege can also emulate numerous simultaneous user interactions.
Gatling
We’d also recommend paying attention to Gatling - a powerful tool known for its extensive out-of-the-box protocol support. Where load testing with JMeter might be slow and tedious (for instance, when working with web sockets), Gatling will create the right level of load without too much difficulty.
It should be also noted that, unlike JMeter, Gatling does not use the GUI and is considered a tool aimed at more skilled testers who can write testing scripts in the .txt file format.
Gatling has its cons, however. Some testers scolded it for not having good enough documentation. In addition, you will need to use Scala to work with it (because test scripts are written in this language).
LoadRunner
Another prominent Jmeter competitor among the top performance testing tools for Magento is LoadRunner. It will become especially interesting in cases where there is a need to reproduce the behavior of many virtual users at once, who simultaneously perform completely different actions with the tested site.
Not only this makes it possible to evaluate the ability of the tested solution to process the stream of simultaneous requests. It also allows indicating how the active interaction of users on one side impacts the user experience of others.
Profilers
The next thing you might need with through Magento testing is profilers. The most popular are Blackfire and Tideways. Both analyze PHP code and collect data about server resources used, such as memory, processor time, and I/O operations. They will help to make the reporting data more digestible and detailed.
Analytics
Lastly, analytics solutions come in more than handy. There are a great many of them. The most famous are Piwik, Kissmetrics, Google Analytics, and Woopra. Each of them has special report tabs that allow you to understand how quickly the site loads and how quickly it responds to user actions.

Image Source: www.fmeextensions.com
Performance Testing Procedures: 4 Main Steps
All in all, the usual procedure of end-to-end Magento 2 performance testing comprises three major steps.
Step #1 - data generation
First off, the proper data is needed to be generated for a test environment. Depending on your consistency with the client, you can implement the testing procedure either in production or separately, on the local server.
These tools will help out a lot:
Step #2 - creating a testing script
Regardless of the Magento performance toolkit you choose, you will have to simulate real user journeys. Here, for example, is a great tutorial on creating a practical plan for performance testing.
As for the volume of load, it should be calculated the following way:
the number of simulated users = (the number of sessions per hour x average duration of a user session in seconds)/3,600
After that, you will need to go through the checklist that should precede the launch of the test (it is typical for conducting in a test environment, as the conditions of real environments can vary greatly).
Thus:
- create a backup of the existing Magento database;
- check how properly your selected tools work;
- block the availability, ping, and other check services for the time of testing;
- activate the servicing mode;
- check whether integration channels are disabled;
- verify the performance of a backed-up site;
- check whether the site copy works in a local mode exclusively;
- back up the important data into a log;
- create a “performance test” note in the log.
Now, you can safely begin testing without fear that some data will be lost and the site will freeze. From time to time, make sure that your testing tool captures data in real time.
Step #3 - study the results
Upon the end of testing, you get results data to analyze. For instance, Jmeter provides data in the form of HTML code. However, for testers, they usually turn out to be insufficiently detailed, so it makes sense here to use the profiling tools that we mentioned above.
You should also keep the following aspects of proper testing in mind:
- analysis of the data received in the reports should be carried out in accordance with the indicated specifications and business requirements for the product;
- in case of an insufficient test, you should come up with the performance optimization scenario;
- with the introduction of every new script, a repeated testing procedure should be conducted;
- be especially cautious with critically important data and back everything up.
Now you can move on with Magento website optimization.
Summary
We hope a lot that we help you figure out the most proper toolkit for testing your Magento 2-based solution. It’s all in how properly you approach the whole thing.
If you don’t want to bother with all the underlying processes yourself, however, it’s best to turn to experienced professionals. We offer our specialization in creating eCommerce solutions powered by Magento 2. Let us help implement the best market practices and unique approaches with your particular project. Contact us right now to discuss the details.


Lassen Sie Profis Ihre Herausforderung meistern
Unsere zertifizierten Spezialisten finden die optimale Lösung für Ihr Unternehmen.